DHIS2 user create using web api
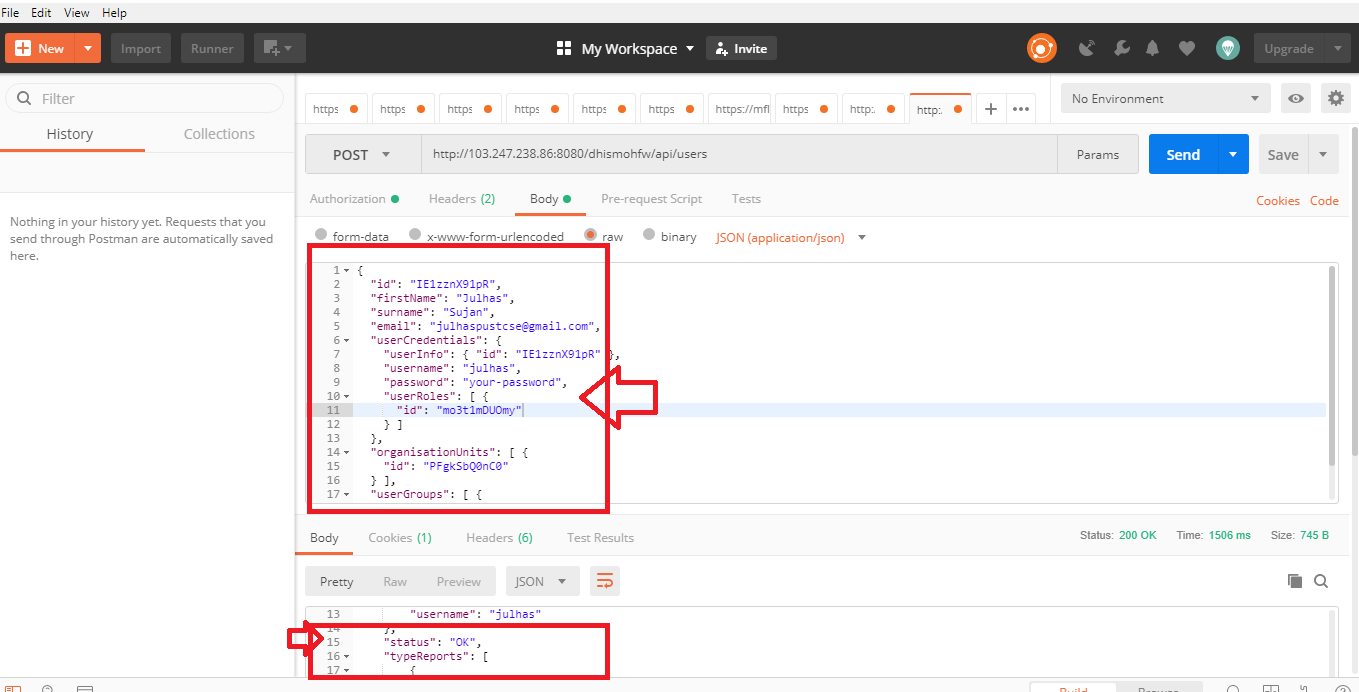
Sometimes, we face problem to create DHIS2 users using web api. In this post we will show you how to create users in DHIS2 using web api. See the below json payload: Please follow the below steps:Step-1: Create the below json payload:
{
  "id": "IE1zznX91pR",
  "firstName": "Julhas",
  "surname": "Sujan",
  "email": "julhaspustcse@gmail.com",
  "userCredentials": {
    "userInfo": { "id": "IE1zznX91pR" },
    "username": "julhas999",
    "password": "your-password",
    "userRoles": [ {
      "id": "mo3t1mDUOmy"
    } ]
  },
  "organisationUnits": [ {
    "id": "PFgkSbQ0nC0"
  } ],
  "userGroups": [ {
    "id": "L7advm7THNS"
  } ]
}
Here,
“id”: “IE1zznX91pR” = user 11 digits unique id. You can generate this id from the below api:
../dhis/api/system/id
Generate the unique id and update the below lines: “userInfo”:
  "id": "IE1zznX91pR",
{ "id": "IE1zznX91pR" },
Step-2: Make sure the user roles, organisationUnits, userGroups with UID
Step-3: Post the json payload to the below endpoint
http:..../dhis/api/usersUpdate user information
For this to work properly (currently) you need to generate an ID (/api/system/id) and then modify the payload like this:
....your_server/api/users/ID
{
  "id": "qTPEeaICy2R",
  "firstName": "John",
  "surname": "Doe",
  "email": "johndoe@mail.com",
  "userCredentials": {
    "userInfo": { "id": "mIJv1aK1j5A" },
    "username": "julhas",
    "password": "DGHS@1234#",
    "userRoles": [ {
      "id": "22syrkUpfij"
    } ]
  },
  "organisationUnits": [ {
    "id": "2NLjKwsVjod"
  } ],
  "userGroups": [ {
    "id": "2kSiKmOzhSX"
  } ]
}
Step-4: Enjoy the output:

Step-1: Create the below json payload:
{
  "id": "IE1zznX91pR",
  "firstName": "Julhas",
  "surname": "Sujan",
  "email": "julhaspustcse@gmail.com",
  "userCredentials": {
    "userInfo": { "id": "IE1zznX91pR" },
    "username": "julhas999",
    "password": "your-password",
    "userRoles": [ {
      "id": "mo3t1mDUOmy"
    } ]
  },
  "organisationUnits": [ {
    "id": "PFgkSbQ0nC0"
  } ],
  "userGroups": [ {
    "id": "L7advm7THNS"
  } ]
}
Here,
“id”: “IE1zznX91pR” = user 11 digits unique id. You can generate this id from the below api:
../dhis/api/system/id
Generate the unique id and update the below lines: “userInfo”:
  "id": "IE1zznX91pR",
{ "id": "IE1zznX91pR" },
Step-2: Make sure the user roles, organisationUnits, userGroups with UID
Step-3: Post the json payload to the below endpoint
http:..../dhis/api/usersUpdate user information
For this to work properly (currently) you need to generate an ID (/api/system/id) and then modify the payload like this:
....your_server/api/users/ID
{
  "id": "qTPEeaICy2R",
  "firstName": "John",
  "surname": "Doe",
  "email": "johndoe@mail.com",
  "userCredentials": {
    "userInfo": { "id": "mIJv1aK1j5A" },
    "username": "julhas",
    "password": "DGHS@1234#",
    "userRoles": [ {
      "id": "22syrkUpfij"
    } ]
  },
  "organisationUnits": [ {
    "id": "2NLjKwsVjod"
  } ],
  "userGroups": [ {
    "id": "2kSiKmOzhSX"
  } ]
}
Step-4: Enjoy the output:
