DHIS2 OAuth2.0 Authentication & Fetch Resources
DHIS2 supports the OAuth2 authentication protocol. OAuth2 is an open standard for authorization which it allows third-party clients to connect on behalf of a DHIS2 user and get a reusable bearer token for subsequent requests to the Web API. DHIS 2 does not support fine-grained OAuth2 roles but rather provides applications access based on user roles of the DHIS2 user.
Each client for which you want to allow OAuth 2 authentication must be registered in DHIS2.
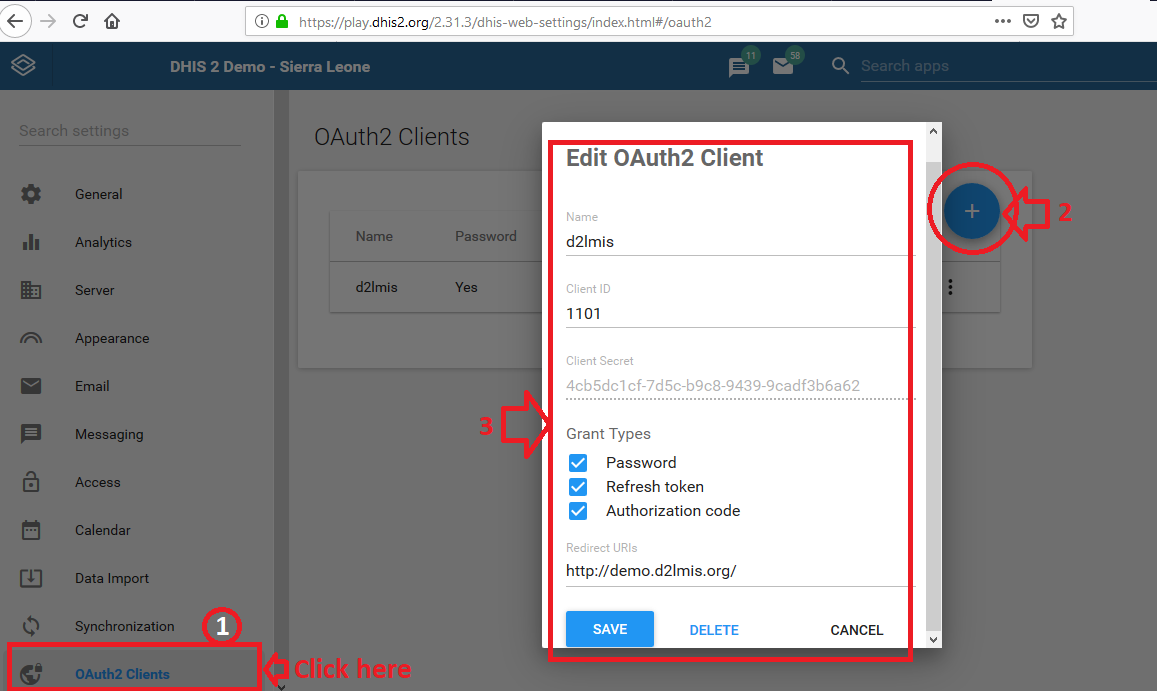
Step-01: To add a new OAuth2 client go to Apps > Settings > OAuth2 Clients, click add new and enter the desired client name and the grant types.
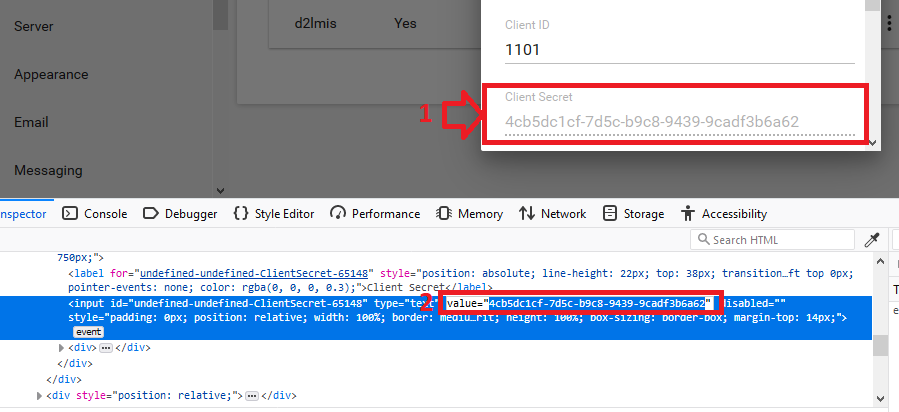
Follow the above mentioned steps and add the new client. Step-2: Get the client secrete: To get the access token, we have to provide the client secrete in our request. Inspect the “Client Secrete” and copy it as (since this field is disabled): Client Secrete: 4cb5dc1cf-7d5c-b9c8-9439-9cadf3b6a62
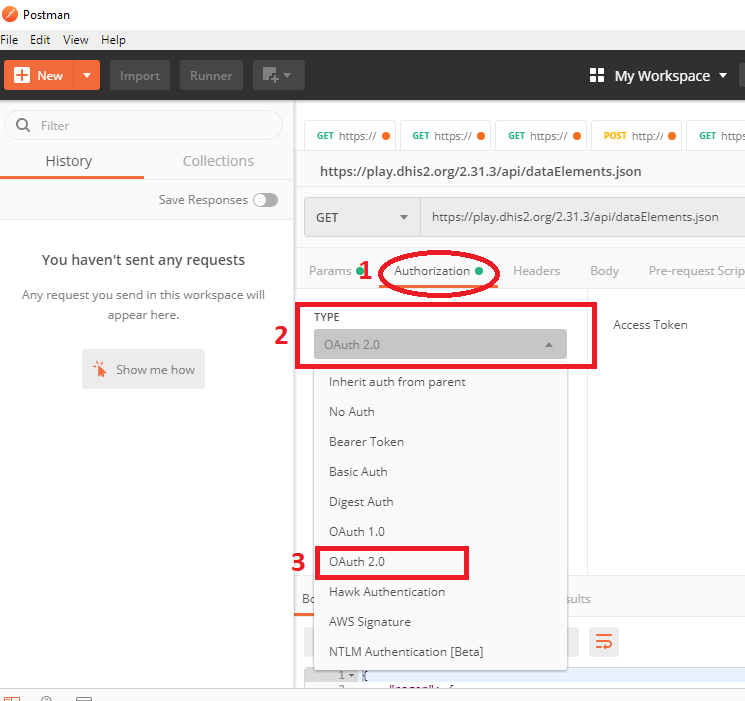
Step-3: Open your Postman and select OAuth2:
Step-04: Get access token:
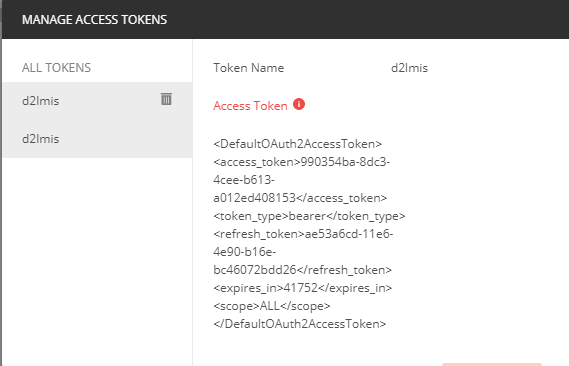
Complete the below fields and request for access token: Here, Token Name: your provided token name in DHIS2 OAuth2 client setup Grant type: Password Credential that means you have provide DHIS2 access credential to get access token Access token URL: your server with end point >> “uaa/oauth/token” Username & Password: Your DHIS2 username and password Client ID: from DHIS2 OAuth2 client setup Client Secrete: from DHIS2 OAuth2 client setup When you click on the “Request Token”, you will get the below token as XML format:Now, your access token is: 990354ba-8dc3-4cee-b613-a012ed408153990354ba-8dc3-4cee-b613-a012ed408153 bearer ae53a6cd-11e6-4e90-b16e-bc46072bdd26 41752 ALL
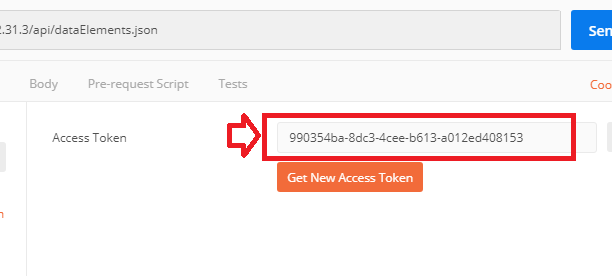
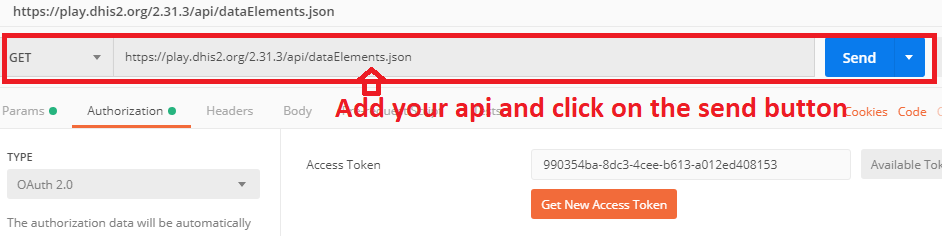
Step-4: Use the access token and get data from DHIS2: Go back to Postman and add the token in the below text box:
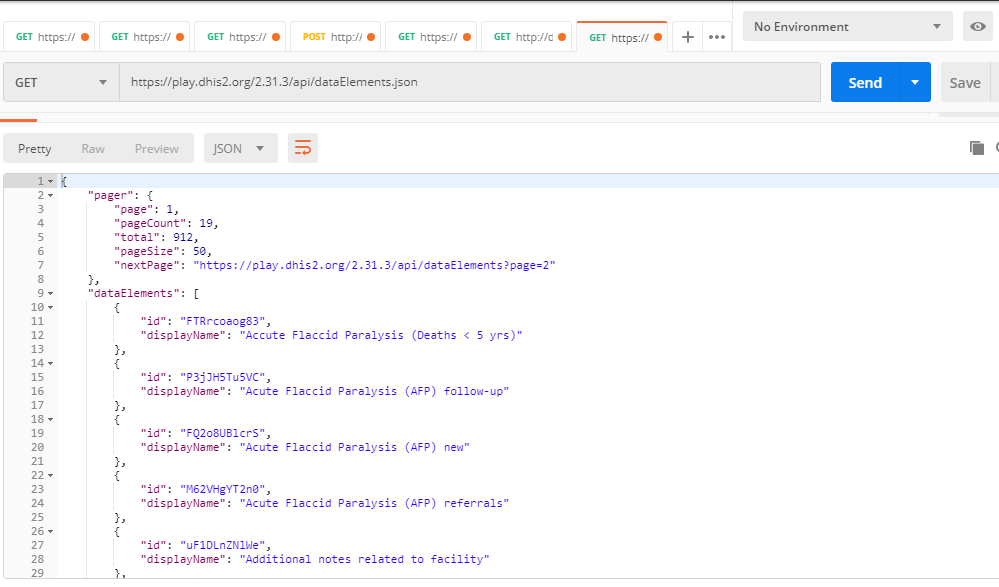
Now, type your desired api and enjoy the output!

DHIS2 supports the OAuth2 authentication protocol. OAuth2 is an open standard for authorization which it allows third-party clients to connect on behalf of a DHIS2 user and get a reusable bearer token for subsequent requests to the Web API. DHIS 2 does not support fine-grained OAuth2 roles but rather provides applications access based on user roles of the DHIS2 user.
Each client for which you want to allow OAuth 2 authentication must be registered in DHIS2.
Step-01: To add a new OAuth2 client go to Apps > Settings > OAuth2 Clients, click add new and enter the desired client name and the grant types.
Follow the above mentioned steps and add the new client. Step-2: Get the client secrete: To get the access token, we have to provide the client secrete in our request. Inspect the “Client Secrete” and copy it as (since this field is disabled): Client Secrete: 4cb5dc1cf-7d5c-b9c8-9439-9cadf3b6a62
Step-3: Open your Postman and select OAuth2:
Step-04: Get access token:
Complete the below fields and request for access token: Here, Token Name: your provided token name in DHIS2 OAuth2 client setup Grant type: Password Credential that means you have provide DHIS2 access credential to get access token Access token URL: your server with end point >> “uaa/oauth/token” Username & Password: Your DHIS2 username and password Client ID: from DHIS2 OAuth2 client setup Client Secrete: from DHIS2 OAuth2 client setup When you click on the “Request Token”, you will get the below token as XML format:Now, your access token is: 990354ba-8dc3-4cee-b613-a012ed408153990354ba-8dc3-4cee-b613-a012ed408153 bearer ae53a6cd-11e6-4e90-b16e-bc46072bdd26 41752 ALL
Step-4: Use the access token and get data from DHIS2: Go back to Postman and add the token in the below text box:
Now, type your desired api and enjoy the output!